Pages

Sunday, 20 April 2014

Tomato Cucumber & Hearts Salad


Hello friends! This is a first for me... I'm on vacation right now and don't have access to a computer.. I am writing this blog post on my IPhone. I hope the pics will come out OK... I will be able to check the result in a couple days :-)

With the sun making himself more present this week, I am starting to whip up some summer recipes. This one is a favorite at home and even some friends make special requests to have this side dish when they come over for dinner. It takes about 8 minutes to make and is simply delicious!!

TOMATO CUCUMBER & HEARTS SALAD

You will need:

- 12/15 cherry tomatoes
- one large cucumber 
- one can of hearts of palm 


 For the dressing you will need:

- olive oil 
- white balsamic vinegar
- dijon mustard
- honey
- your choice of salad herb mix
- salt and pepper


Directions:


Cut the cherry tomatoes in half and the cucumber and hearts of palm in bite size pieces. You can leave the skin on the cucumber. I chose to peel it off this time around. Put in a bowl and set aside.


For the dressing: I never mesure the ingredients. I like to use one part vinegar and two parts oil. For this recipe you will need around 1/3 cup total amount of dressing. In a bowl put about one tablespoon of honey, a teaspoon of dijon mustard, and perhaps 2-3 tablespoons of white balsamic vinegar. Give it a good whisk.


Start adding the oil slowly whisking vigorously. 


It takes time but you need to emulsify your ingredients. This way the oil will incorporate in the other ingredients and make a creamy dressing. If emulsified properly they will not seperate afterwards. Then add some salad herbs, salt and pepper to taste.


Pour over your veggies and toss so every piece is covered in dressing. If you have time let the salad sit for 15 minutes but it will be very tasty right away! Enjoy!!


I really do hope this blog post looks OK... I can't say writing on my IPhone is easy but I could not wait to get home! Happy Easter by the way! This is a beautiful day!!!

Saturday, 5 April 2014

Delicious Water!!!


Delicious water!!! Our body is made of 50-60 % of this glorious liquid... We just simply can't live without it! I am one of those people who just have always loved drinking water... I am not a soda or even a juice fan... too sweet and most important of all not good for the body.

Having your daily intake of water does the body good: eliminates headaches, gives a clear complexion, stronger hair, helps the body cleanse itself through urine and perspiration, good for joint and muscle health... and I bet you can find 100 more good reasons to trade the soda and juice for water. Now don't get me wrong, I do drink coffee each day and I do love a bottled soda once in a while.

I can understand water might be non-appealing to some folks and trying to create a habit of drinking water might be difficult when you are used to taste the very strong flavours found in soda and juices.
I have a couple tricks that might help you start loving water! I drink it each day with a twist...


Even if I love the simple glass of water I find giving it a little twist makes me feel like I'm having  treat. During the day I will press half a lemon or orange in my glass of water. Usually people will flavour their water by putting in slices of fruit. I prefer pressing all the juices out of the citrus. It gives a lovely flavour to the water and at the same time I benefit from the properties of the fruit (contains high levels of potassium and vitamin C, stimulates the liver helping the body cleanse itself). At night I will do the same but this time I use sparkling mineral water. I will add the juice of half an orange and half a lemon or half a grapefruit... sometimes a little lime... and this drink feels like a treat!


Give it a try! You might be surprised how good this tastes! Enjoy!

Sunday, 30 March 2014

Marinated Lemon Rosemary Chicken Recipe


So here we are March 30th and guess what?? It is snowing again! Another 15 cm plus high winds!!! I'm starting to think we will skip spring and summer in 2014... Even though this is my favourite season I can't wait for spring to kick in because I want to start running and I don't want to do that on snowy streets. I am very clumsy when it comes to walking on ice so imagine running!

Last week I was craving a roasted chicken but all I had was chicken breasts so I thought I would transform my roasted rosemary chicken recipe into a marinade. It turned out pretty good and the flavours satisfied my craving. Here is the recipe!

Marinated Lemon Rosemary Chicken Recipe

You will need:
- 2 chicken breasts
- a lemon
- 3 cloves of garlic
- 3 rosemary sprigs
- 1/2 cup olive oil
- 2 tablespoons of butter
- salt and pepper


Directions:

Cut the chicken breasts into 2 inch pieces, and about a half inch thick. Put them in a freezer bag. 


For the marinade, combine the olive oil, the zest of a lemon, 3 chopped rosemary sprigs, 3 grated garlic cloves (I always grate my garlic on a fine grater), the juice of half the lemon, salt and pepper.
Whisk away!


Pour over the chicken in the freezer bag.


Before you close the freezer bag make sure you work the marinade in between all the chicken pieces. Remove all the air you can from the bag before sealing it. Put in refrigerator for at least 4 hours.


Once marinated cook the chicken pieces in a hot pan with a tablespoon of olive oil. I cooked it in batches to make sure the chicken does not start boiling because it is too crowded in the pan. When cooking in batches I keep the oven turned on at 200 degrees and in it I put the cooked pieces of chicken or whatever I am cooking in a pyrex dish to keep them warm. 


Once all the chicken is cooked through, deglaze the pan with the juice of half a lemon and about a 1/4 cup of water. Add 2-3 tablespoons of butter and let reduce making a delicious tangy sauce. 


Drizzle over the chicken to serve! Enjoy!


I will also share my roasted rosemary chicken recipe very soon. Feel free to link some of your favourite chicken marinades down below and I will give them a try! 


Saturday, 22 March 2014

Dutch Baby Pancake for Two


 It's finally saturday and I'm off for the weekend... Even though chores are waiting for me and also grocery shopping and all that jazz I am so looking forward to something other than having my head filled with numbers (work).  Spring has arrived on the calendar but when I look out my window I see huge snowflakes falling from the sky! Winter has been very snowy and very cold... just like I love it!

My weekend mornings always start with a big breakfast (favourite meal of the day) which usually consists  in oatmeal with caramelized apples, or a cheese and veggie omelette or fresh out of the oven buttermilk biscuits. But since I did not go grocery shopping last night I don't have many options left... Only 3 eggs in the refrigerator, no bacon in sight, no more apples and low on the oats.... but 3 eggs are enough for a dutch baby... and all I need is a little flour, a little milk, a little butter and maple sirup for serving... so I decided to cut in half my recipe and whip up a Dutch Baby Pancake for Two... So simple, so tasty and I can make this in the toaster oven (please note that since this baby will fluff up while cooking I recommend you use the traditional oven for the full recipe to make sure it does not touch the toaster oven elements).

Dutch Baby Pancake for Two

You will need:
- 3 eggs
- 3 tablespoons of butter
- 1/4 cup milk
- 1/4 teaspoon of pure vanilla extract
- 1/2 cup flour
- a pinch of salt
- maple sirup for serving 

Directions:

Preheat your toaster oven or oven to 400 degrees.

Put your butter in a Pyrex 9x9 baking dish. Put the dish in the oven to make the butter melt. Meanwhile make the batter (see below)


In a bowl combine the eggs, milk and vanilla extract.


Whisk until frothy.


Add the flour and salt, whisk again for a minute. Small clumps can remain in your batter. It's never good to over mix pancake batter.

Pour the batter over the melted butter. Do not mix.. Leave it as it is. The butter will end up on top of the batter and that's ok. Put in the oven for 20-30 minutes. Once you reach 20 minutes I recommend you stay close to make sure nothing burns. You will see your pancake fluff and rise on the sides. Drizzle maple syrup on your pancake, serve it with fresh fruit and you will be in breakfast heaven!


This is soooo good!! A delicious weekend treat!! I feel so happy now I can attack with a smile the boring stuff I have on my to do list for the day...


Sunday, 9 March 2014

Easy Coleslaw Recipe


Oh boy! Time flies by! I have not been able to post anything in a couple weeks! I just don't have enough time each day to do everything I love doing... like write blog posts! Between work (40 hrs / week ), crossfit (4 times / week ), cooking and cleaning, there just isn't any hours left for hobbies... But I ain't giving up! I have to adjust! I wanted to be posting 3 times / week but it is clearly not realistic. So let's do something, let's change the numbers: to write a blog post once every week can be done! I have many ideas ahead so being inspired is not the problem here. I will be committing to this blog! It's something I want! It's something I will achieve! Only in a different way than what was planned in the beginning.

Now I have a little recipe for you... This is a recipe for those days you have leftover chicken or even the ones you buy a rotisserie chicken on the way home from work... It take 10 minutes to whip up and 30 minutes if you have the time for the flavours to soak in... It can be kept in the refrigerator for 3-4 days and unless you are a family of 10 you will have left overs for school and work lunches! Here for you is my favourite coleslaw recipe!

EASY COLESLAW RECIPE

You will need:
- one medium cabbage
- 5-6 medium carrots
- 3/4 cup canola oil
- 3/4 cup white vinegar 
- 1/4 cup sugar
- 1 Tablespoon garlic powder
- 1 Tablespoon onion salt
- salt and pepper


Directions:
- Peel and grate the carrots
- Chop the cabbage finely ( keep in mind bite size )
- Put in a large bowl


- In another bowl whisk together all the remaining  ingredients. Whisk long enough for the sugar and salt to dissolve. 


- Add the vinaigrette to the cabbage and carrot. Toss to coat everything evenly.
- Cover and let sit in the refrigerator for 30 minutes at least (to let the flavours soak in) and enjoy! 

The next day the coleslaw will be at its best so make to ahead if chicken is on the menu! Simple, easy, fast... and pretty tasty! Voilà!


Thursday, 6 February 2014

Buttermilk Biscuits Recipe


Last Sunday I wake up feeling very hungry! I stay in bed for a couple minutes wondering what I could eat... fruit of course, I will have some coffee as always, how about an egg.... yes! a fried egg with toast and butter.... yummy! So I get up and walk to the kitchen... boil water for my french pressed coffee... go to the refrigerator to get myself an egg... reach in for the butter... and for the.... wait a minute!?! Where's the bread??? Argh!! No more bread!!

Being the person that I am, if I want to eat toast, I need toast! But it's sunday and I'm still in my pyjama and it looks cold outside... nope! I won't be going out to buy bread... at least not right away... and I'm starving!!! and then, staring at the inside of my refrigerator desperately hoping to make bread appear,  I see a carton of buttermilk..... (angels singing) I won't be eating bread this morning but freshly made just out of the oven buttermilk biscuits!!! Oh yeah!!! They take a minute to put together and what, 15 minutes to cook??? Let's do this shall we?

EASY BUTTERMILK BISCUITS

Preheat the oven to 400 degrees

You will need:

- 4 cups of flour
- 1/2 teaspoon of salt
- 2 Tablespoons of baking powder
- 2/3 cups butter (cut into little cubes and left in the refrigerator until the last minute)
- 1 cup 1/2 plus 2 Tablespoons  buttermilk (left in the refrigerator as well)


Directions:

In a bowl, whisk the flour, salt and baking powder. Add the little cubes of butter. 


Work the butter into the flour mixture using a pastry cutter until the texture of the mixture resembles wet clumpy sand as so:


There has to be small pieces of butter in the mixture and the colder the butter the better!! Woah! Say that 3 times in a row! The reaction of pieces of cold butter warming up in the dough while cooking will make your biscuits rise tall!

Once you have the appropriate texture, add the cold buttermilk to the mixture and stir until everything is moistened. Flour the counter and knead the dough 4-5 times... not more than that. Remember the butter, you do not want to make it melt or be perfectly combined. You need those little pieces of butter everywhere in the dough. Then flatten the dough ball into a flat disc shape (about an inch thick).


Can you see small pieces of butter?? Yum!! then using a knife, cut random forms into the disc. I don't bother using cookie cutters... I love different shapes on a plate. I find it pretty! and as yummy!!


Separate the pieces on a baking sheet. I put parchment paper on the bottom. Pop into the oven and cook for 10-12 minutes or until the top is golden brown. Then transfer to a cooling rack.


MMMMMMMMM!!!! Let's cook an egg... and do it fast before I eat all these biscuits!
A fruit, an egg, a just out of the oven biscuit and a cup of coffee....


Perfect sunday breakfast!! And so much better than that toast I was craving for in the beginning! Voilà!!!


Monday, 27 January 2014

DIY Coffee Face Scrub


 I have been very busy this last weekend working on DIY projects. I thought to myself as I was working on my DIY Lotion Bars, might as well whip up a couple recipes... I already had all the products and measuring cups and spoons in front of me... and I was in need for a face scrub. I wasn't sure what to use and as I was sipping my coffee it came to me... I would be using coffee grounds... and I had just brewed some coffee... so all was good!


 I had heard of people using coffee grounds in a scrub but I had to do a little research beforehand, just to make sure it was safe to start with and I also wanted to know why it would be good for the skin. I found a lot of information on the web. Mostly using coffee on your skin will help with any redness you could have and it has anti-inflammatory properties. Now as a base... why not my favorite one of them all: coconut oil... simple but soooo effective on the skin being hydrating and soothing.

YOU WILL NEED

Equal parts of coffee grounds and coconut oil. I used half a cup of each. My coffee grounds were still damp.

DIRECTIONS

Using a bain marie melt dow your coconut oil. Then, pour over the coffee grounds in a mixing bowl.


You will see the coffee grounds fall to the bottom. Put the bowl in the refrigerator for five minutes or until the coconut oil starts to harden again.


Then with a whisk or a fork mix everything up! If the coconut oil is too liquidy put the bowl in the refrigerator for another minute or two then whisk again... 


Repeat until everything holds together in the centre of the bowl as so:


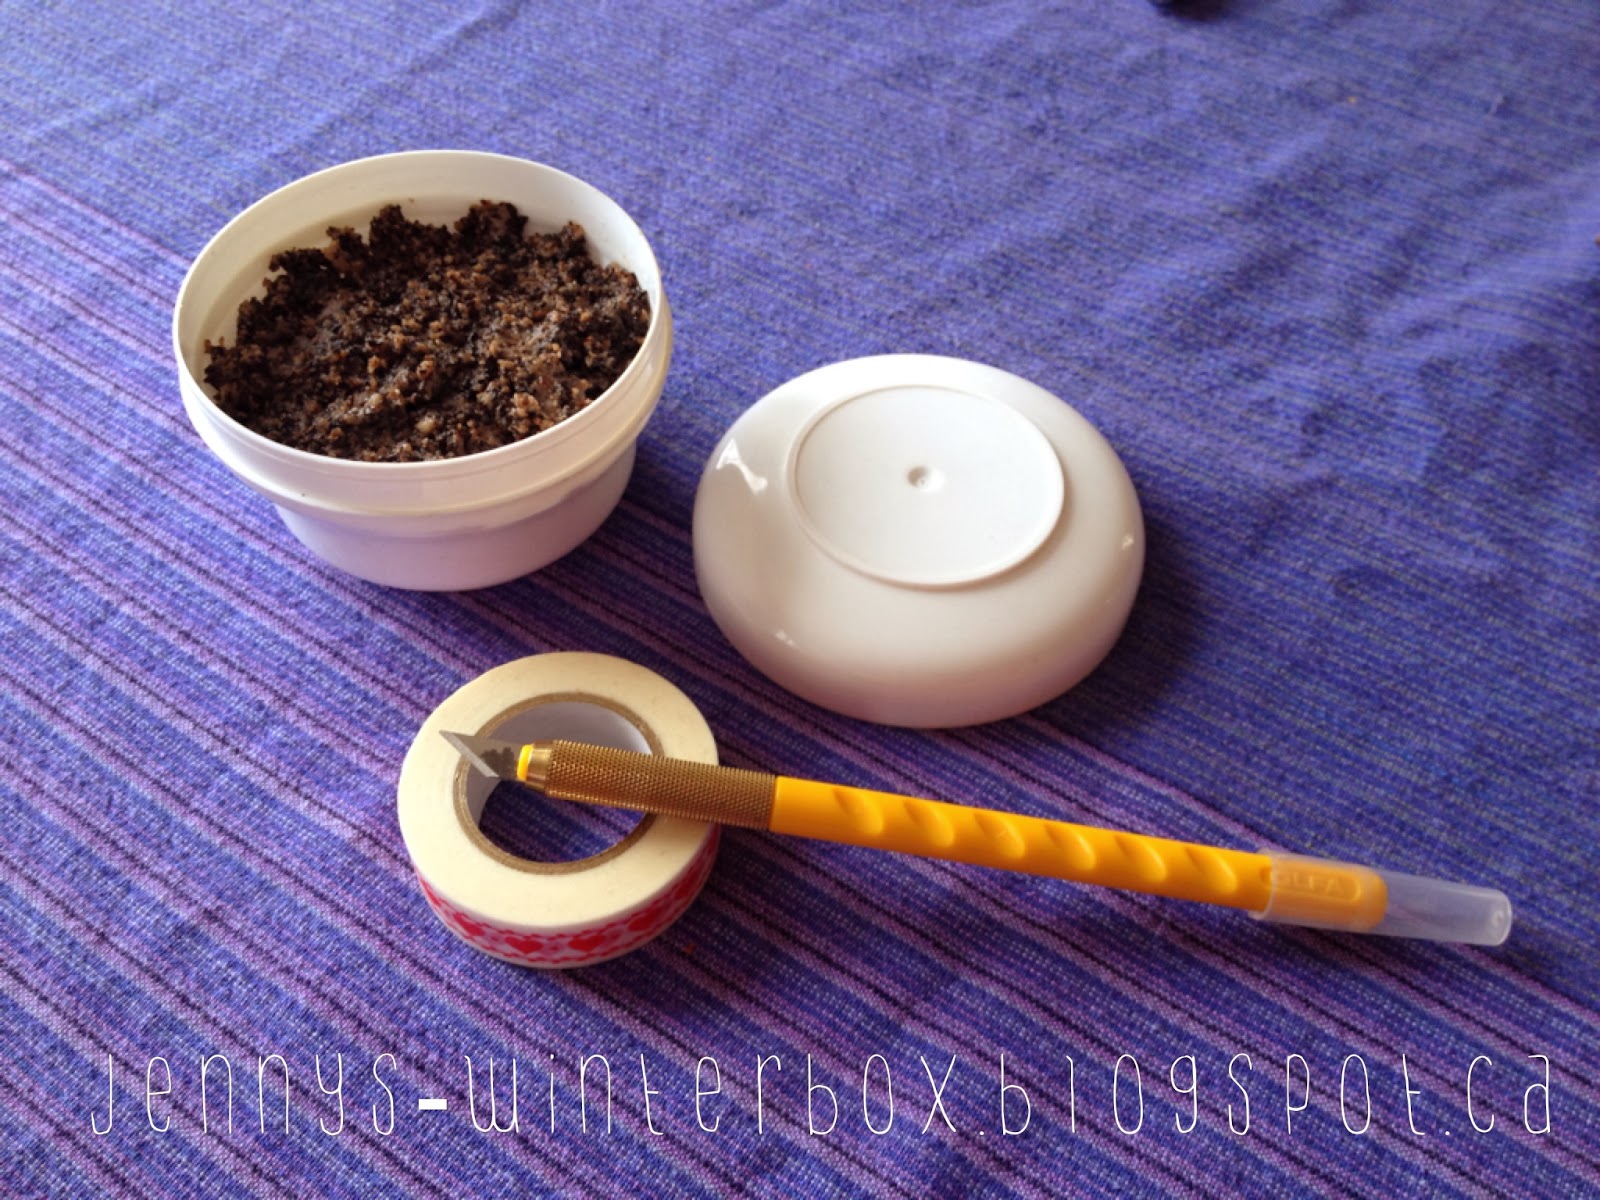
You mixture is now ready to put into a nice container. I had a plastic one that had the perfect size but I thought I'd make it prettier using washi tape:


And voilà!!! A perfect scrub in a perfect container :-)


I used the scrub twice already and it smells divine! What's not to like about the smell of coffee. The coconut oil melts nicely onto the skin. You need to be gentle while scrubbing because coffee grounds are really hard but using gentle circular motions is the key to success! And as with any scrubs, avoid the eye region. Then rinse under lukewarm water. The coconut oil leaves the skin hydrated while the coffee grounds give the skin a lovely pink glow! The next day my skin still felt so soft. You could easily use this scrub all over your body!