Pages

Thursday, 6 February 2014

Buttermilk Biscuits Recipe


Last Sunday I wake up feeling very hungry! I stay in bed for a couple minutes wondering what I could eat... fruit of course, I will have some coffee as always, how about an egg.... yes! a fried egg with toast and butter.... yummy! So I get up and walk to the kitchen... boil water for my french pressed coffee... go to the refrigerator to get myself an egg... reach in for the butter... and for the.... wait a minute!?! Where's the bread??? Argh!! No more bread!!

Being the person that I am, if I want to eat toast, I need toast! But it's sunday and I'm still in my pyjama and it looks cold outside... nope! I won't be going out to buy bread... at least not right away... and I'm starving!!! and then, staring at the inside of my refrigerator desperately hoping to make bread appear,  I see a carton of buttermilk..... (angels singing) I won't be eating bread this morning but freshly made just out of the oven buttermilk biscuits!!! Oh yeah!!! They take a minute to put together and what, 15 minutes to cook??? Let's do this shall we?

EASY BUTTERMILK BISCUITS

Preheat the oven to 400 degrees

You will need:

- 4 cups of flour
- 1/2 teaspoon of salt
- 2 Tablespoons of baking powder
- 2/3 cups butter (cut into little cubes and left in the refrigerator until the last minute)
- 1 cup 1/2 plus 2 Tablespoons  buttermilk (left in the refrigerator as well)


Directions:

In a bowl, whisk the flour, salt and baking powder. Add the little cubes of butter. 


Work the butter into the flour mixture using a pastry cutter until the texture of the mixture resembles wet clumpy sand as so:


There has to be small pieces of butter in the mixture and the colder the butter the better!! Woah! Say that 3 times in a row! The reaction of pieces of cold butter warming up in the dough while cooking will make your biscuits rise tall!

Once you have the appropriate texture, add the cold buttermilk to the mixture and stir until everything is moistened. Flour the counter and knead the dough 4-5 times... not more than that. Remember the butter, you do not want to make it melt or be perfectly combined. You need those little pieces of butter everywhere in the dough. Then flatten the dough ball into a flat disc shape (about an inch thick).


Can you see small pieces of butter?? Yum!! then using a knife, cut random forms into the disc. I don't bother using cookie cutters... I love different shapes on a plate. I find it pretty! and as yummy!!


Separate the pieces on a baking sheet. I put parchment paper on the bottom. Pop into the oven and cook for 10-12 minutes or until the top is golden brown. Then transfer to a cooling rack.


MMMMMMMMM!!!! Let's cook an egg... and do it fast before I eat all these biscuits!
A fruit, an egg, a just out of the oven biscuit and a cup of coffee....


Perfect sunday breakfast!! And so much better than that toast I was craving for in the beginning! Voilà!!!


Monday, 27 January 2014

DIY Coffee Face Scrub


 I have been very busy this last weekend working on DIY projects. I thought to myself as I was working on my DIY Lotion Bars, might as well whip up a couple recipes... I already had all the products and measuring cups and spoons in front of me... and I was in need for a face scrub. I wasn't sure what to use and as I was sipping my coffee it came to me... I would be using coffee grounds... and I had just brewed some coffee... so all was good!


 I had heard of people using coffee grounds in a scrub but I had to do a little research beforehand, just to make sure it was safe to start with and I also wanted to know why it would be good for the skin. I found a lot of information on the web. Mostly using coffee on your skin will help with any redness you could have and it has anti-inflammatory properties. Now as a base... why not my favorite one of them all: coconut oil... simple but soooo effective on the skin being hydrating and soothing.

YOU WILL NEED

Equal parts of coffee grounds and coconut oil. I used half a cup of each. My coffee grounds were still damp.

DIRECTIONS

Using a bain marie melt dow your coconut oil. Then, pour over the coffee grounds in a mixing bowl.


You will see the coffee grounds fall to the bottom. Put the bowl in the refrigerator for five minutes or until the coconut oil starts to harden again.


Then with a whisk or a fork mix everything up! If the coconut oil is too liquidy put the bowl in the refrigerator for another minute or two then whisk again... 


Repeat until everything holds together in the centre of the bowl as so:


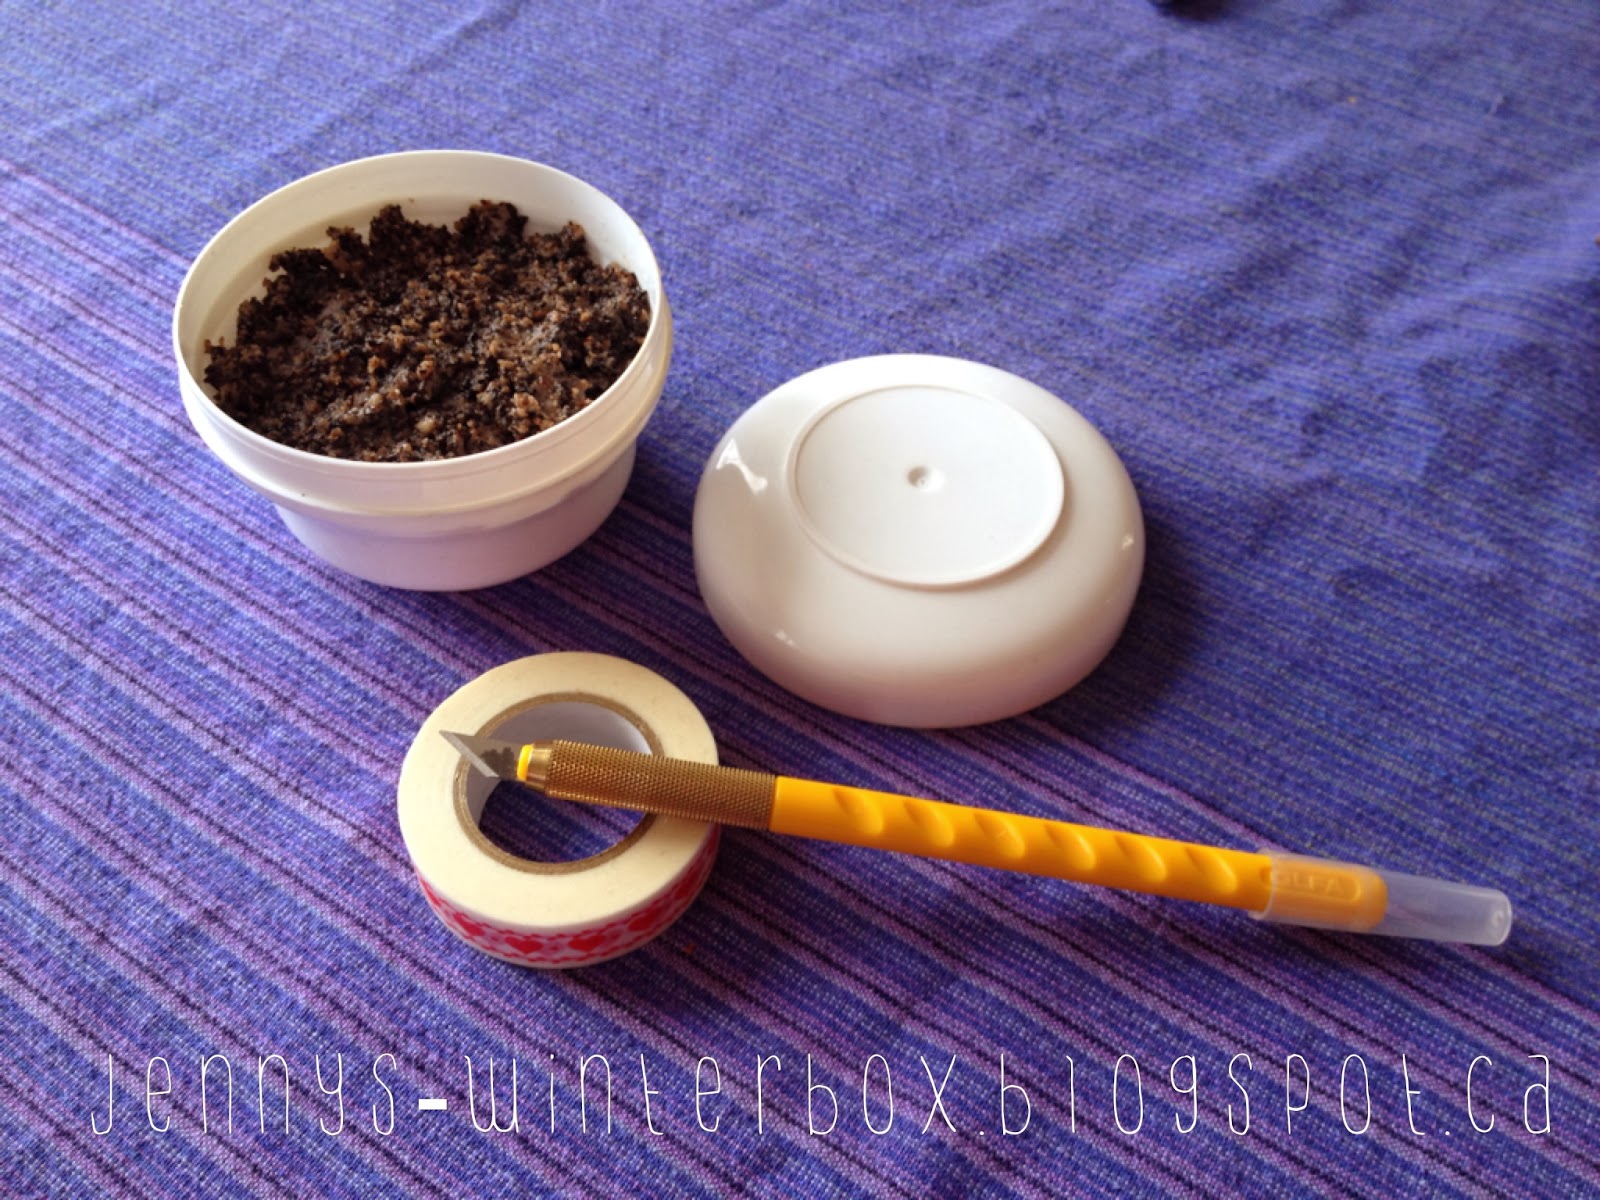
You mixture is now ready to put into a nice container. I had a plastic one that had the perfect size but I thought I'd make it prettier using washi tape:


And voilà!!! A perfect scrub in a perfect container :-)


I used the scrub twice already and it smells divine! What's not to like about the smell of coffee. The coconut oil melts nicely onto the skin. You need to be gentle while scrubbing because coffee grounds are really hard but using gentle circular motions is the key to success! And as with any scrubs, avoid the eye region. Then rinse under lukewarm water. The coconut oil leaves the skin hydrated while the coffee grounds give the skin a lovely pink glow! The next day my skin still felt so soft. You could easily use this scrub all over your body!

Sunday, 26 January 2014

DIY banana goodness face mask

We are having crazy weather these days... going from -30 degrees celsius to +6 degrees the next day with 30mm of rain falling from the sky... My skin has been doing pretty well since I started using my DIY Honey Face wash. It stays hydrated throughout the day and for the first time in many years I don't feel any rough areas on my chin and my cheeks (I used to get them all the time during winter). I even feel my complexion has improved. My skin feels soft and has a nice rosy glow about it. Even the blemishes I could get from time to time have disappeared. Even though all seems good I still feel I need to give the skin of my face a little extra love twice a week during winter. This is why I came up with a face mask recipe that feels like an angels whisper on my skin! I had all the ingredients at home already and it's pretty easy to make!


You will need:
- Half banana (hydrating, rich in vitamin C)
- 2 tablespoons of raw honey (leaves the skin soft, has anti-bacterial and anti-fungal properties)
- 2 tablespoons of rolled oats (hydrating, is a natural cleanser, removes excess oil)
- 2 tablespoons of yogurt (reduces discoloration, skin brightener, hydrating)
- 1 teaspoon of chia seeds (rich in essential fatty acids, rich in antioxidants)
- 1 teaspoon of lemon juice (exfoliates, brightens the skin)
- White tea (protects the skin)


First of all make a cup of tea and let it come to room temperature. As you can see on the photo, I put the chia seeds in a glass. Chia seeds will absorb around 8 time their volume when in contact with liquids. They then have a gelatine texture (which is really nice on the face) Once the tea is at room temperature, add 8 teaspoons of tea to the chia seeds. Also mix in the honey. Set aside for 5 minutes. 

This will happen:


See how the chia seeds grew in volume! Now is the time to put the mask together:

In a bowl mash half a banana with a fork. Add the lemon juice and mix well. You can then add all the other ingredients: chia seeds, yogurt and rolled oats (that you previously have put in the coffee grinder bringing them to powder)


And there you go! As simple as that! I use it on a clean face and leave it on for 10 minutes. It can be a little messy but I tell you, it is worth the mess! My face feels brand new after that! And so soft! I keep it in the fridge for up to a week.


It almost looks like breakfast!... well... you could eat it! That is the great thing about this face mask! If it is good for my belly imagine how good it can be for my skin!  

DIY Basic Lotion Bars


Before I begin with this recipe... I got some great news a couple days ago... My little sister will have a baby next september! I am ecstatic!! I will be an aunt for the first time! This is such good news! My 13 year old daughter will finally have a cousin! Babies have a great power... the power to bring smiles and happiness to families. That is what I believe! They are little rays of sunshine that escaped from the sky :-)

I thought of sending a little box of surprises to my sister... just little bits and pieces to make her smile. I will do a blog post later this week on the contents of this little box for expecting mothers. Of course this one is personalized to her tastes but most certainly it will give a general idea of little things to look for. The main components of the box are lotion bars I made yesterday. These bars are made from organic ingredients and I have not put any essential oils or perfume into them. They have a sweet scent due to the natural smell of the ingredients but nothing more. I wanted to keep them as natural as possible. My sister will be able to use these hydrating bars on her growing belly to prevent stretch marks.  They are very easy to make and know that this is a base recipe. You could add the essential oils of your choice depending on what purpose you want to give the bars. I will let you know in the directions when it would be appropriate to add the essential oils.


INGREDIENTS:

equal parts of *I used 1 cup of each*:
- coconut oil (provides deep moisture)
- cocoa butter, I grated mine (rich in antioxidants, hydrating, healing properties for sensitive skin)
- beeswax, I chopped it into flakes (anti-baterial properties, locks in moisture)

A couple tablespoons of sweet almond oil *I used 2* (rich in vitamins, hydrating, emollient qualities)

A couple capsules of vitamin E *I used 4* (protectant, healing, hydrating)


DIRECTIONS:

Prepare a bain marie. I used a tempered glass measuring cup in a pan containing 2 inches of simmering water.


Add your beeswax and let it melt away. As you can see I am using a chop stick to mix things around.


Once the beeswax has completely melted, turn of the heat but leave the pan on the stove. Add the coconut oil and the cocoa butter to the beeswax and melt them down. It happens on its own really but I like mixing with my chop stick.


Once melted down remove the measuring cup from the pan (be careful the handle will be hot, use a towel to pick it up) and add the sweet almond oil and the vitamin E to the mixture (punch a hole in the capsules with a knife and press the oil out, discard the capsules). This would be the time to add a couple drops of essential oils if you were using any. Mix well.


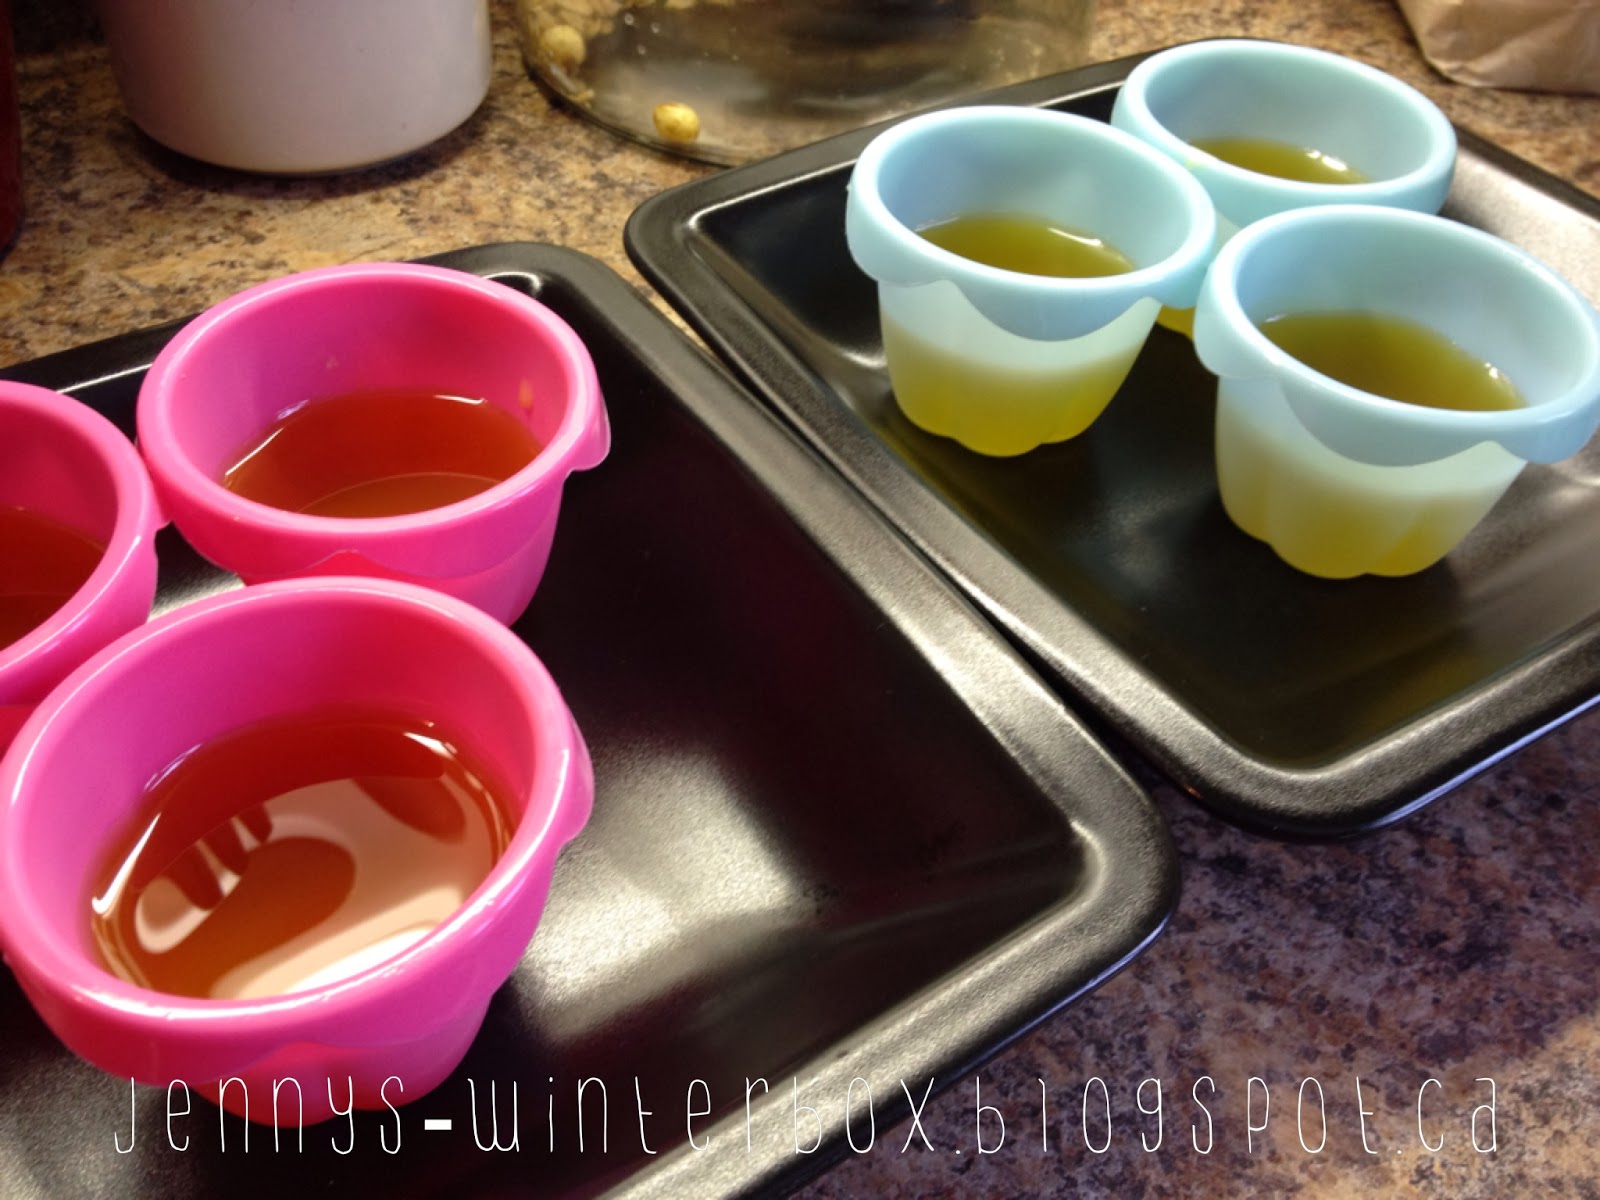
You can now fill your molds. Silicone molds work best I find but you could use regular muffin pans.


I found some pink and blues cupcake molds and thought it was funny to use both colours since we don't know if my sister is having a boy or a girl... or both! Leave them on the counter a couple minutes until they start to set then transfer to the fridge for at least a couple hours. After that they are ready to go! They melt nicely with the body's temperature and are very hydrating. They also smell divine! The scent reminds me of the Bounty Chocolate Bars I eat from time to time; a mix of chocolate and coconut... heaven for the sense of smell! I wrapped them up in waxed paper and found and old candle tin to store the bar that will be used every day. I hope my sister likes them!


Monday, 20 January 2014

A night to myself!


Just a couple of hours before the end of what has been a wonderful weekend! Yesterday was a busy day, running errands and grocery shopping for the week (this also means planning in my mind what I will have to cook in the days to come), then the visit of a friend for hockey night! Was up early and went to bed really late or rather early sunday morning!

Today was different. Even if the chores weren't completed yesterday, my Sunday was dedicated to breathing... anyways laundry tends to be a very patient friend and I bet it will wait for me as long as I need. I woke up around 7 getting ready for Crossfit. Was back home around 10 and made some candied bacon that was added to breakfast. Had my coffee and took the time to sit and relax until my legs were ready to move. Ended up leaving home at 3 in the afternoon for a lovely walk into town.  I am gathering little bits and pieces here and there to assemble an 'expecting mother's gift' (will do a blog post on my findings later this week) and found some fun stuff in the little shops downtown.

Then after dinner I decided to take the night off everything and everybody and take care of ME... something I started doing from time to time last year. I have been raising my daughter by myself for the last 13 years and until a couple months back I never really did take moments for myself. I was a mom and had forgotten that I existed way before my daughter was part of my life. My dear one made me realize at one point that it was necessary I let myself take some time off my mommy duties once in a while... even if it's just the time to take a hot bath.

I still have issues with that sometimes (I always take care of people... that's what I do best... it's part of me...) and I am very lucky to have someone in my life reminding me that in order to give to others you need to take some energy in... to recharge the batteries... So back in august I started Crossfit. I go 3 time a week and make it a priority. I go alone and feel great doing something for myself! And from time to time I will have a Sunday night like this one...

Started off with a walk... taking the time to breathe... It's very nice outside tonight... snowing again! On the picture below you can see my little schnauzer Jack! He is one of a kind! and he loves winter. I think he might have been a Husky in a past life! no joke! hehehe


 Once back home I made myself a cup of tea and chose the book I'd bring with me in the bath... This is the book of the moment. A gift I made myself for Christmas... Loving it so far!


My tea tonight... earl grey with a little sugar and milk... my favourite!


 Then came the time to choose a bath bomb... a hot bath is soooo much better with a Lush bath bomb. My choice tonight... the snowman that was part of their Christmas collection (Calming fragrance of yang-ylang and vanilla... with hydrating cocoa butter) This is a real treat! My candle: London Calling from Bath and Body Works. I don't know if they still have it in store (I bought it last year). The scent: A royal blend of tea, lemon and sugar!


And finally... my choice of music tonight... Chris Cornell's beautiful voice... I have been listening to him for almost 20 years now... through Soundgarden, Audioslave and also Chris Cornell alone... He has a voice from heaven...  Tonight I chose his live album Songbook.

I now feel relaxed and ready to take on what the next week will bring! Writing this blog post is also part of my taking time for myself. I don't see this as extra work but rather as a time to build
something of my own. I don't spend as much time as I would like writing but am slowly getting there.

So goodnight for now blog readers and have a wonderful week! Take some time or yourself this week! It makes everything so much better! I will see you again soon!


Thursday, 26 December 2013

DIY Honey Facewash

Winter is here!!! My favorite season! Oh! I love cold weather and snow! But my skin being very sensitive, it goes a little crazy during winter time... I need to moisturize from head to toe every day and stay away from products that contain harsh chemicals. The lesser ingredients, the better!!!

When it comes to facewash I have the same problems! Store bought products make the skin of my face very itchy and dry (even those made for sensitive skin!!). I decided a couple months back to make my own facewash... This facewash contains my favorite ingredient of them all and is very easy to make.


DIY Honey Facewash

you will need:
- Rosewater glycerine (I buy mine at my local drugstore)
- Honey (non-pasterized)
- Castile soap (I use unscented baby mild castille soap from Dr. Bronner's Magic Soaps. Found mine at Target)


and also:

- a whisk
- a mixing bol
- a small funnel
- the container of your choice to store the facewash (this recipe fills 2X80ml containers)
- a mesuring spoon (1 Tablespoon)


Measure out your ingredients and put into the mixing bol:

100ml Rosewater Glycerine (attracts moisture onto the skin, works as a protectant)
3 Tablespoons of Honey (leaves the skin soft, has anti-bacterial and anti-fungal properties)
3 Tablespoons of Castile Soap (made with organic oils, free from synthetic fragrances and preservatives and is eco-friendly)


Whisk away! (not too much because you will see your product lather... but enough for everything to be well combined).


Using your funnel, fill your container and voilà!!! It can't get easier than that!!!

The consistency is very liquidy... You could also use glycerin alone instead of rosewater glycerin which would give you a thicker facewash... I keep mine in the shower and use it morning and night making the product lather in my hands before applying... then rinsing in warm water. The honey makes the smell divine! My face is left soft and feeling hydrated!

Thursday, 10 October 2013

Lemon and Honey Ginger Tea Recipe (for sore throats)

Long time no see!!! This past month has been crazy!!! Time flies by so fast! I really need to work on my schedule in order to do all I want to do in a week... Six Weeks ago I started what has become a fantastic adventure: Crossfit. I thought I could be satisfied with one or two nights a week but three times it is! I love it!! So demanding yet totally beneficial for my body, mind, my confidence... I am slowly becoming the stronger version of myself.... in may ways! I wont get into that tonight but will share my thoughts on my new addiction soon enough.

In spite of all the good foods I'm eating and the fresh air I'm breathing, I did manage to catch the flu this past weekend. Stayed in bed for three days with a runny nose, a sore throat and a massive headache. This happens to me sometimes at fall. I live in Quebec city Canada. We are having an amazing month of October weather wise but this time of the year can be tricky: so nice and warm in the afternoon you can walk outside in a tee-shirt, but then , without announcing itself the wind wakes up and you are freezing! Nights are very cold. Windows opened all day, then closed at night unless you forget and wake up in the middle of the night like it was winter in your bedroom...

With winter just around the corner I thought I would share with you my dad's recipe to soothe a sore throat... I have been drinking this concoction since I was  little girl and find it very effective! Helps relieve the pain before bedtime and is very comforting. I even drink it just for the pleasure of it!

LEMON AND HONEY GINGER TEA (for sore throats)

Ingredients: 

- boiling water
- the juice of half a lemon
- 1 1/2 teaspoon of honey
- 1/4 teaspoon of ground chinese ginger


This is very simple: Pour yourself a cup of boiling water as you would for tea. Add the juice of half a lemon, a teaspoon and a half of honey, 1/4 teaspoon of ginger, mix very well. I let mine sit for five minutes before drinking. If the water is too hot, it will just increase the burning sensation of a sore throat.